3D Studio Max (3dsmax) is a 3D modeling, animation, and rendering tool.
It is owned by Autodesk, an United States (San Rafael, California) based company.
More information about 3D Studio Max can be found at: http://www.autodesk.com/3dsmax/
Note: A free 30 days trial version can be downloaded from the Autodesk site.
Some 3D Studio Max forums:
Create a teapot with color and texture (teapot3_color_texture.max).
Information
This guide is based on 3D Studio Max 7.
Procedure
Step 1: Load the teapot model
- Download teapot1.max
(see quick guide "Create a teapot".)
- Start 3D Studio Max 7.
- Load teapot1.max, select menu: File | Open
Note: If you see the File Load: Units Mismatch dialog, choose the
option Adopt The File's Unit Scale. This will change your system unit,
so be sure to reset your system unit after completing this quick guide.
Step 2: Add a color to the teapot
- Open the Material Editor
 or
press M-key. or
press M-key.
- Select the first sample slot
 . .
If active, it has a white border.
- The first slot has a Raytrace material type assigned to it. This should
be reset into a Standard material type.

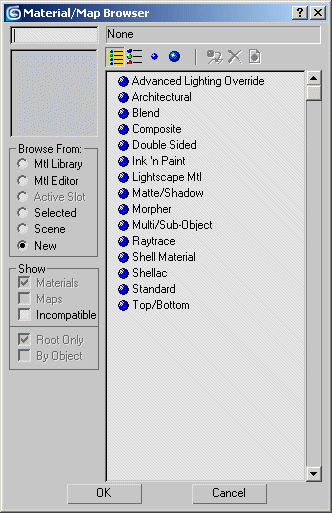
- Reset the first slot to the Standard material type by pressing button Raytrace and in the Material/Map Browser select
Standard and press button OK.

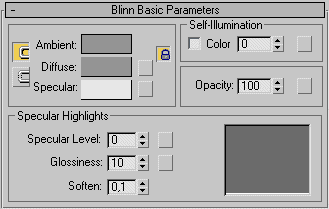
- Goto the Blinn Basic Parameters rollout which contains controls that let you set the color
of your material.

- Click the gray color swatch labeled Diffuse. A Color Selector appears.

- Enter Red=255, Green=0, Blue=0 and press Close button.
- The material is red, as you can see in the sample slot.
- In the Blinn Basic Parameters rollout > Specular Highlights group:
Set the Specular Level to 80
Set the Glossiness to 20.

- In the material name field, below the sample slots, highlight the default name of
"01 - Default" (the number can vary), and enter
"Color Red".

- In a viewport select the teapot and in the Material/Map browser click on
button "Assign material to selection"

- In the viewports the teapot is now red.

- Select menu: File | Save as.
- Save the model as teapot2_color.max.
Step 3: Add a texture
- Download the texture image mobilefish_m3g.png to C:\
- Start 3D Studio Max 7 and
reload teapot2_color.max.
- Open the Material Editor
 or
press M-key. or
press M-key.
- Select the second sample slot
 . .
If active, it has a white border.
- Goto the Blinn Basic Parameters rollout which contains controls that let you set the texture map.

- Click the blank square button
 next to the Diffuse color swatch.
- The Material/Map Browser is opened.

- Choose Bitmap and click OK.
- The "Select Bitmap Image File" dialog opens.
Select the texture mobilefish_m3g.png from C:\ folder and click Open.

- The texture appears on the sample sphere.

- In a viewport select the Plane and in the Material Editor click on
button "Assign material to selection"

- The Plane turns gray.

- In the Material Editor click on button "Show Map in Viewport"

- The texture map appears on the surface of the Plane.

- In the map name field, below the sample slots, highlight the default name of
"Map #0" (the number can vary), and enter
"Mobilefish map".
- In the Material Editor click on button "Go to Parent"

- In the material name field, below the sample slots, highlight the default name of
"Default #0" (the number can vary), and enter
"Mobilefish material".
- Close the Material Editor.
- Press the Quick Render button
 (or F9). (or F9).
- You should see the following:

- Select menu: File | Save as.
- Save the model as teapot3_color_texture.max.
|
|

