OpenCms is a professional level open source web site content management system to create
and manage complex intranet, extranet and internet sites easily without knowledge of HTML.
An integrated WYSIWYG editor with a user interface similar to well known office
applications helps the user create the contents, while a sophisticated template
engine enforces a site-wide corporate layout. As true open source software, OpenCms
is completely free of licensing costs and the source code can be downloaded.
There are more than 50 companies around the world who offer a variety of professional OpenCms related
solutions and services. All documentation and training materials are available in English.
OpenCms is based on Java and XML technology, so it fits perfectly into almost any
existing modern IT infrastructure. OpenCms features are:
- Manage multiple sites in one installation
- Full text search also in PDF, Word, Excel documents in repository
- Configurable meta information (properties) for all repository resources
- Time based automatic content release /expiration
- Full support for Unicode content
- Optional static export of HTML
- JSP based template mechanism
- Templates are version controlled
- Advanced multi language support
- Web browser based application
- Full control over the output layout
- All XML content is schema validated
- Version control of content
- History of changes
- XML based content import / export
- Multi path resource access through siblings
- Dynamic page rendering
- Link checking
- Combination of static and dynamic content
- Fully database driven
- Non-GUI shell access to document repository
- Powerful log file configuration
- Based on Java
- Easy Installation
- Integrated user management and permission system
- Project based publishing
- Workflow and Task Management
- WYSIWYG editor
- Template mechanism
- Online-Help System
- Personalization
- Caching system
- Module mechanism for extensions
- Security/SSL support
- Scheduling system
- Synchronization mechanism
- Application server integration / EJB support
- Search engine support
- Clustering for load balancing and failover
- CmsShell
Overview of OpenCms 6.0 requirements:
|
|
Virtual Machine
|
- Sun Java VM (1.4 or higher)
|
|
Operating system
|
- Windows (2000/ME/NT/XP)
- Linux
- Sun Solaris (2.5.1 or higher)
- HP-UX (11.0 or higher)
|
|
Web server
|
- Apache (1.3.19 or higher)
- MS Internet Information Server (5.0 or higher)
|
Application server
Requires:
Servlet 2.3
JSP 1.2
|
- Tomcat (4.1.x, 5.0.x, 5.5.x.)
- ATG Dynamo
- Bea WebLogi
- WebSphere
|
|
Database
|
- MySQL 3.2.x-4.0.x or MySQL 4.1.x
- Oracle
- MS SQL-Server (7.0 or higher)
- Sybase
- Postgres SQL 7.4.x
- IBM DB2
|
|
Hardware
|
- Runs on a notebook computer
- Standard configuration: Normal Intel PC, 2Ghz CPU, 1 GB Ram
- Other: SUN Sparc, cluster configuration possible
|
More information about OpenCms can be found at:
http://www.opencms.org
The latest OpenCms version can be downloaded from:
http://www.opencms.org/opencms/en/download/index.html
OpenCms forums can be found at:
http://www.opencms-forum.de
http://news.gmane.org/group/gmane.comp.cms.opencms.devel
Gartner Group recognizes OpenCms as "one of the most complete
and mature of the Open Source CMS products reviewed".
Source: Gartner Group report "Roundup of Open-Source Content Management Systems, 1H04" (April 2004)
Installing OpenCms 6.0
Information
none
Operating system used
Windows XP Home Edition Version 5.1 SP 2
Software prerequisites
Java 2 Standard Edition (J2SE) SDK, version 1.4 or higher.
Tomcat 4.1.x, Tomcat 5.0.x and Tomcat 5.5.x.
MySQL, version 1.2 or higher.
Procedure
- Download and unzip opencms_6.0_beta_3.zip
Note:
The zip file contains 4 files: history.txt, install.html, license.txt and opencms.war
- Deploy file opencms.war to your tomcat webapp directory.
E.g.: C:\Tools\Tomcat 4.1\webapps
- In a browser, type:
http://localhost:8080/opencms/setup/index.jsp
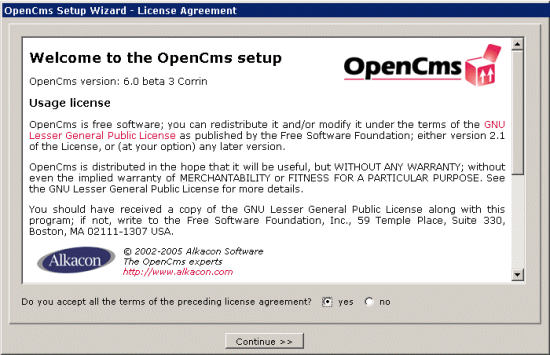
- Accept the terms of the license agreement and press continue button.
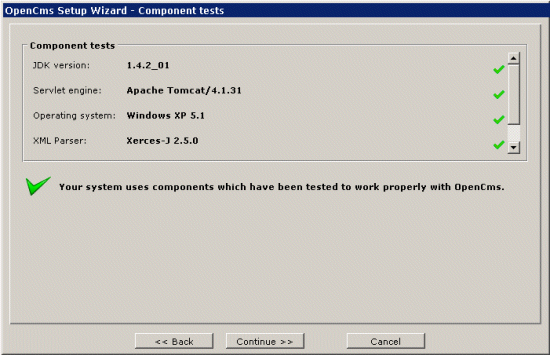
- The setup checks if all required components are installed.
Press continue button if no error messages are displayed.
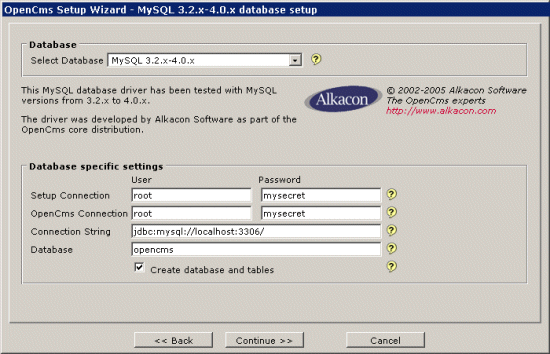
- Setup the database.
|
|
Select Database
|
Select a database.
You can choose the following:
- MySQL 3.2.x-4.0.x
- MySQL 4.1.x
- Oracle
- Postgres 7.4.x
- ANSI SQL-92 (Generic)
MySQL configuration notes:
MySQL limits the size of packets which can be stored in the database.
In order to increase the maximum file size for OpenCms, you have to adjust
this setting for MySQL.
Locate the file mysql.ini (Windows systems) respectively mysql.conf
(Unix systems) and add the line
set-variable=max_allowed_packet=8M
to increase the size e.g. to 8 MB.
MySQL 3.2.x versions support packets up to 16 MB, MySQL versions 4.0.x
are only limited by the amount of available memory on the server.
|
|
Setup Connection
|
The Setup Connection is used only during this setup process.
The specified user must have database administration permissions in order to
create the database and tables. This user information is not stored after the
setup is finished.
For example:
User=root
Password=mysecret
|
|
OpenCms Connection
|
The OpenCms Connection is used when running OpenCms after the installation.
For security reasons, the specified user should not have database
administration permissions. This user information is stored in
the opencms.properties file after the setup.
For example:
User=root
Password=myscecret
|
|
Connection String
|
Enter the JDBC Connection String to your database.
For example:
Connection String=jdbc:mysql://localhost:3306/
|
|
Database
|
Enter the name of the MySQL Database which should be used by OpenCms.
For example:
Database=opencms
|
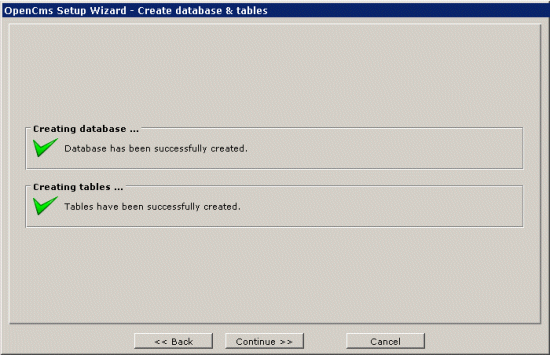
- The database "opencms" is created. Press continue button.
Note: If for some reason you get error messages you need to drop the database
(if created) before you start setup
(http://localhost:8080/opencms/setup/index.jsp)
over again.
- Select modules for installation. Select which modules you want to install and press continue button.
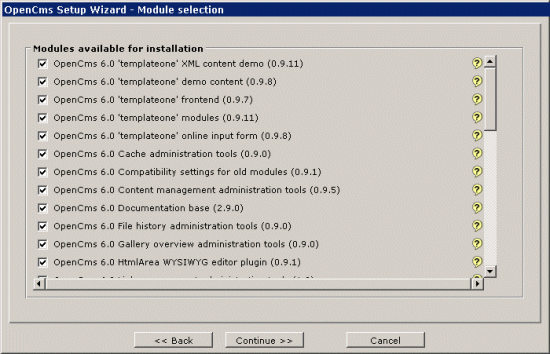
An overview of all the modules can be found below:
- OpenCms 6.0 'templateone' XML content demo (0.9.11)
- OpenCms 6.0 'templateone' demo content (0.9.8)
- OpenCms 6.0 'templateone' frontend (0.9.7)
- OpenCms 6.0 'templateone' modules (0.9.11)
- OpenCms 6.0 'templateone' online input form (0.9.8)
- OpenCms 6.0 Cache administration tools (0.9.0)
- OpenCms 6.0 Compatibility settings for old modules (0.9.1)
- OpenCms 6.0 Content management administration tools (0.9.5)
- OpenCms 6.0 Documentation base (2.9.0)
- OpenCms 6.0 File history administration tools (0.9.0)
- OpenCms 6.0 Gallery overview administration tools (0.9.0)
- OpenCms 6.0 HtmlArea WYSIWYG editor plugin (0.9.1)
- OpenCms 6.0 Link management administration tools (1.0)
- OpenCms 6.0 Scheduled Jobs Management (0.9.1)
- OpenCms 6.0 Search index administration tools (0.9.0)
- OpenCms 6.0 Static export administration tool (0.9.0)
- OpenCms 6.0 User Management (0.9.1)
- OpenCms 6.0 Welcome page and release notes (3.9.3)
- OpenCms Flex cache documentation (2.9.0)
- OpenCms JSP basic documentation (2.9.0)
- OpenCms JSP example set 1 (2.9.0)
- OpenCms JSP example set 2 (2.9.0)
- OpenCms JSP example set 3 (2.9.0)
- OpenCms JSP scriptlet documentation (2.9.0)
- OpenCms JSP taglib documentation (2.9.0)
- OpenCms JSP template howto (2.9.0)
- OpenCms Multisite documentation (2.9.0)
- OpenCms Original JSTL examples (2.9.0)
- OpenCms Original Tomcat JSP examples (2.9.0)
- OpenCms Workplace translation howto (2.9.0)
- OpenCms XML content documentation (2.9.0)
- OpenCms direct edit examples (2.9.0)
- OpenCms module management documentation (2.9.0)
- OpenCms search documentation (2.9.0)
- OpenCms search examples (2.9.0)
- OpenCms static export documentation and test data (2.9.0)
- OpenCms with Apache http 2.0, Tomcat and mod_proxy configuration howto (2.9.0)
Note: For this demo all modules have been selected.
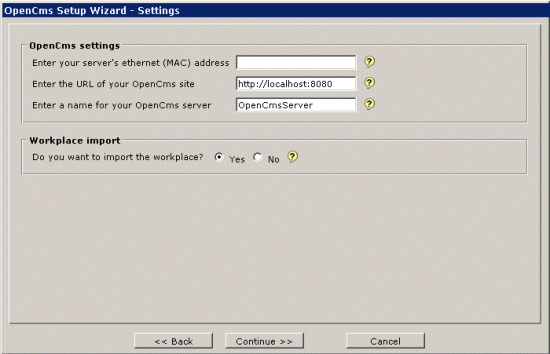
- OpenCms settings.
|
|
Mac Address
|
Why the ethernet address is needed:
OpenCms generates unique keys for all resources based on a 128-bit UUID
(Universally Unique IDentifier, aka GUID in the Windows world) algorithm.
To initialize this algorithm, the ethernet address of the server is required.
However, Java has no way of accessing this information from the server hardware
because of the sandbox security model.
You can leave this field empty, and a random ethernet address will be generated
for your OpenCms server. This means there is a very, very, very slight chance
that someone else in the universe might create some duplicate keys.
Please note: The ethernet (MAC) address is NOT the IP address of the server.
A valid MAC ethernet address looks like this: 4f:a1:f1:c2:36:bf
|
|
URL
|
The OpenCms site URL:
OpenCms is capable of managing multiple sites. However, the OpenCms
Workplace must always be accessed through one specific URL.
The site URL you enter here will be used both as URL to access the Workplace,
and as URL for the default site. In case you want to add other sites,
or if you want to use different URLs for default site and Workplace,
you must manually edit the opencms.properties file after the installation.
For example: http://localhost:8080
|
|
Servername
|
The server name:
This server name will be used for various log messages in OpenCms.
This can be handy if you have to compare logfiles from a couple of
different servers.
For example: OpenCmsServer
|
|
Import
|
Importing the Workplace is required for an OpenCms installation.
Do not change this setting unless you know exactly what you do!
This imports all resources for the OpenCms Workplace in the virtual file
system (VFS). A scenario where you might not want to import the Workplace
is e.g. to connect a second server against an already initialized OpenCms
database.
|
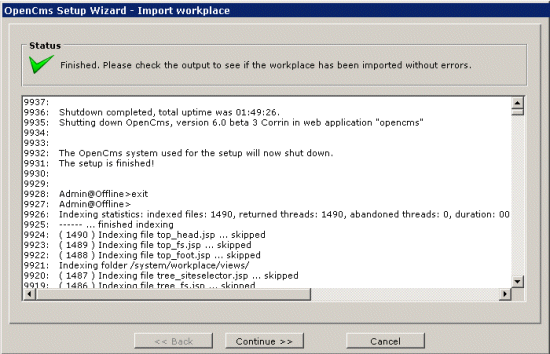
- The workspace will be imported and will take approx 15 min. After this process is finished,
press the continue button.
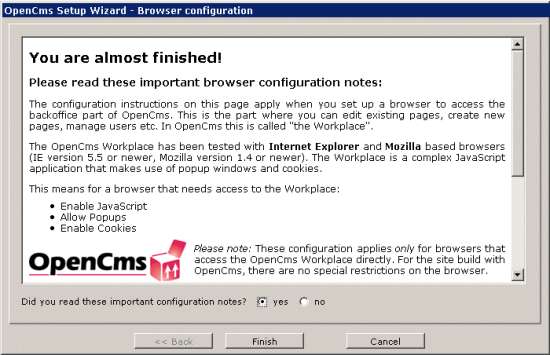
- Read the browser configuration notes and press finish button.
- The setup wizard will be locked (http://localhost:8080/opencms/setup/index.jsp)
and the OpenCms welcome page
(http://localhost:8080/opencms/opencms/index.jsp) will be displayed.
Setup wizard will be locked
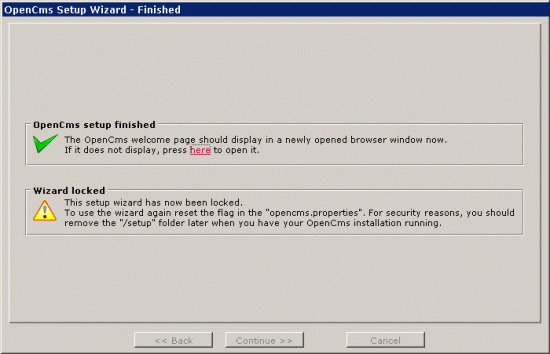
Remark: To unlock the setup wizard:
- Goto C:\Tools\Tomcat 4.1\webapps\opencms\WEB-INF\config
- Edit file opencms.properties
- Change wizard.enabled=true
The OpenCms welcome page will be displayed
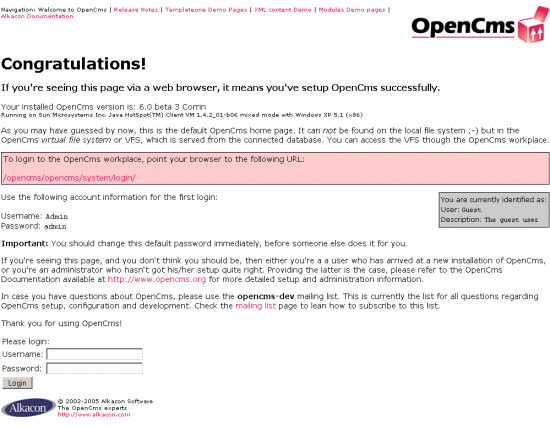
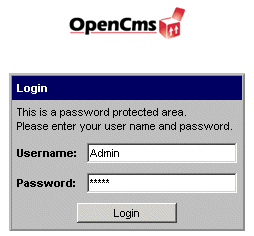
- To access the OpenCms Workplace, type:
http://localhost:8080/opencms/opencms/system/login/
Username=Admin
Password=admin
- The Workplace is displayed.
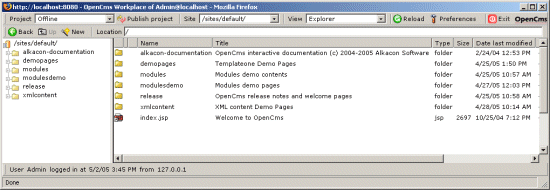
- For security reason you MUST change the Admin password:
- Select on the toolbar "Preferences".
- select tab "User Data".
- Press button "Change Password"
- Now change the Admin password.
Current password=admin
New password=cmssecret
Confirm password=cmssecret
|
|


