How to build and install the IOTA testnet wallet on macOS
Information
https://github.com/iotaledger/wallet
Operating system used
macOS 10.12 Sierra
Software prerequisites
Node.js
Java IOTA Reference Implementation (IRI)
Procedure
- Install IOTA wallet source code.
Type: mkdir ~/tools
Type: mkdir ~/tools/iota_testnet
Type: cd tools/iota_testnet
Type: git clone https://github.com/iotaledger/wallet
Type: cd wallet
- Show current git branch.
Type: git branch -a
Output:
* master
remotes/origin/HEAD -> origin/master
remotes/origin/dev
:
- Show all tags.
Type: git tag -l
Output:
:
v2.4.0
v2.5.0
v2.5.1
:
- Checkout a tagged version:
Type: git checkout tags/v2.5.1
- Show current git branch.
Type: git branch -a
Output:
* (HEAD detached at v2.5.1)
master
:
- Replace ~/tools/iota_testnet/wallet/package.json with ~/tools/iota_testnet/wallet/package.testnet.json
Type: cp package.testnet.json package.json
Note:
If you have previously installed and build an older wallet version, you might get errors.
It is recommended to delete the ~/tools/iota_testnet/wallet/node_modules folder first before you execute the "npm install" command.
- Install components.
Type: npm install
Note:
If you have previously installed and build an older wallet version, you might get errors.
It is recommended to delete the ~/tools/iota_testnet/wallet/node_modules folder first before you execute the "npm install" command.
- THIS STEP IS NOT REQUIRED IS YOU RUN A LIGHT NODE!
Copy the Java IOTA Reference Implementation jar file.
Type: cp ~/tools/iota_testnet/iri/target/iri-xxx.jar ~/tools/iota_testnet/iri/iri-testnet.jar
Note:
See the ~/tools/iota_testnet/wallet/package.testnet.json how the iri.jar should be named.
- Create a seed (must have 81 characters).
Method 1:
Type: cat /dev/urandom |LC_ALL=C tr -dc 'A-Z9' | fold -w 81 | head -n 1
Method 2:
https://ipfs.io/ipfs/QmdqTgEdyKVQAVnfT5iV4ULzTbkV4hhkDkMqGBuot8egfA
Note:
This seed is used to create the IOTA deterministic wallet.
Save this seed in a secure location!
- Run the app.
Type: npm start
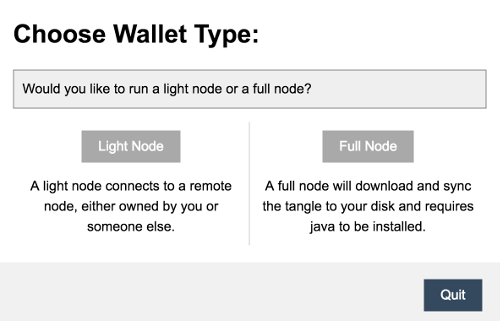
- Choose IOTA wallet type, select "Light Node".

- Select menu: Tools | Edit Node Configuration
- Change the host, choose Custom, enter a host endpoint and press the Start button.
- https://testnet140.tangle.works:443
- http://p101.iotaledger.net:14700
- http://p103.iotaledger.net:14700
- Enter minimum weight magnitude: 9
Minimum weight magnitude is the amount of validation that is required before considering your transaction to be confirmed
.
This value can change in the feature!
On the mainnet this value is 15 on the testnet this value is 9.
Higher values should be no problem but will just cause the Proof of Work to take longer unnecessarily.
Meaning you computer will spend more time for the PoW, waisting your resources.
But you should NOT decrease this value below the minimum weight magnitude, otherwise your transaction will not be confirmed.
- Enter CURL implementation:
- Webgl 2 Curl implementation
This option means use your graphics card (GPU).
This allows the wallet to use your graphics card to do the Proof of Work, thereby speeding up the process.
Some people will find that they get an Invalid Transaction Hash when they use this setting. The solution is to select CCURL instead.
- CCurl implementation
This option means do not use your graphics card (GPU) but use your CPU.
CCurl is the C port of the Curl library.
Note:
If you use a Mac use Webgl 2 Curl implementation.
If you use a PC use CCurl. If you are sure your PC is using the graphics card than select Webgl 2 Curl implementation.
- If connected to a host enter your seed and press the Login button.
- A few interesting links:
IOTA faucet
Testnet IOTA Tangle Explorer
|
