Oracle VM VirtualBox is a virtualization software package for x86 and AMD64/Intel64-based computers from Oracle Corporation.
The VirtualBox package installs on an existing host operating system (Linux, Mac OS X, Windows XP, Windows Vista, Windows 7, Windows 8, Solaris, OpenSolaris, FreeBSD and Genode) other
guest operating systems (as applications), each known as a Guest OS, to load and run, each with its own virtual environment.
The latest Oracle VM VirtualBox version can be downloaded from:
http://www.oracle.com/technetwork/server-storage/virtualbox/downloads/index.html
Install Oracle VM VirtualBox Extension Pack.
Information
Install Oracle VM VirtualBox Extension Pack on a Windows host where Oracle VM VirtualBox is installed where an Ubuntu VM is running.
Operating system used
Windows Vista Home Premium SP 2
Software prerequisites
Oracle VM VirtualBox on Windows.
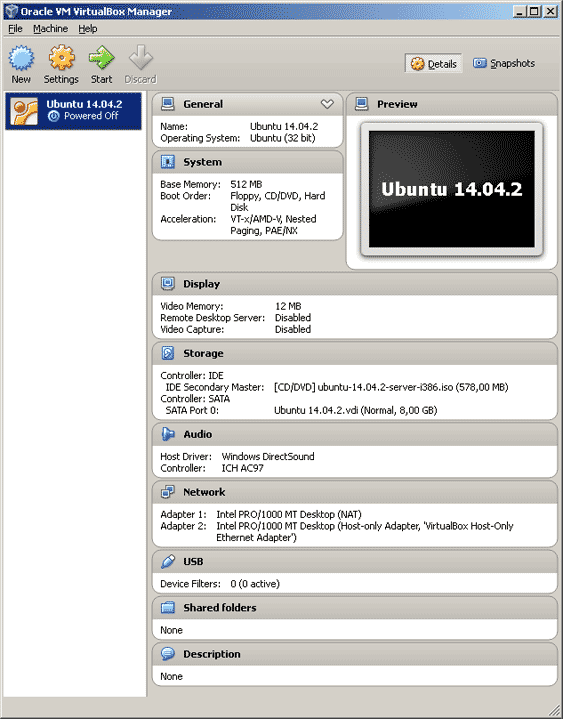
Create Ubuntu VM in the Oracle VM VirtualBox.
Procedure
- Download VirtualBox 4.3.24 Oracle VM VirtualBox Extension Pack on your Windows host.
For example: c:\VirtualBox-4.3.24-98716-Win.exe
Note:
Recent versions can be downloaded from: https://www.virtualbox.org/wiki/Downloads
- Double click this file and press Install.

- Agree the license and after installation press OK button.

- The Oracle VM VirtualBox Extension Pack will be installed in directory:
C:\Program Files\Oracle\VirtualBox\ExtensionPacks\Oracle_VM_VirtualBox_Extension_Pack
- The file VBoxGuestAdditions.iso can be found in folder:
C:\Program Files\Oracle\VirtualBox\VBoxGuestAdditions.iso
- Start your Ubuntu VM in the Oracle VirtualBox.

- An Ubuntu VM terminal opens. Login with your account.
- Update your APT database, type: sudo apt-get update
- Install the latest security updates, type: sudo apt-get upgrade
- Install required packages, type: sudo apt-get install build-essential module-assistant
Note:
If there are packages installed which are no longer required, type: sudo apt-get autoremove
- Configure your system for building kernel modules, type: sudo m-a prepare
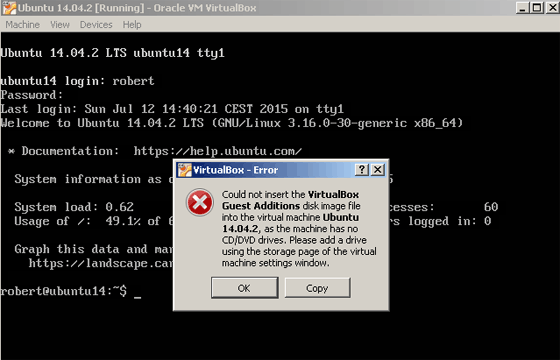
- Click the Oracle Virtual Box "Devices" menu and select "Install Guest Additions CD Images...".

An error window opens:
The Virtualbox Guest Additions disk image file (VBoxGuestAdditions.iso) can not be inserted into the Ubuntu VM.
The next few steps will solve this problem. Press OK to close this window.
- Now stop the Ubuntu VM. Do this, otherwise you can not add a CD/CDROM device.
- Select the Virtualbox menu: Settings | Storage
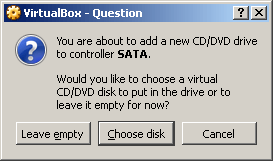
- Press the CDROM with the + button to add the CD/CDROM device.

- Select button "Choose disk"

- Select the disk image file:
C:\Program Files\Oracle\VirtualBox\VBoxGuestAdditions.iso
and press OK button.
- Start the Ubuntu VM and login.
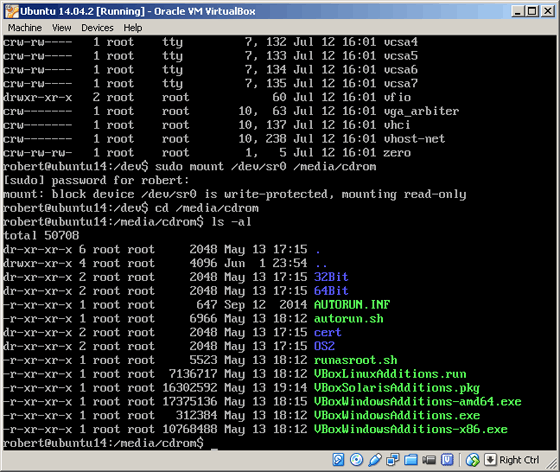
- Mount the virtual CD Rom, type: sudo mount /dev/sr0 /media/cdrom
Note 1:
/dev/sr0 is created when you add the CD/CDROM device in the Virtualbox storage settings.
Note 2:
/dev/cdrom was not created when you add the CD/CDROM device in the Virtualbox storage settings.
- Change the directory to the virtual CD Rom Drive, type: cd /media/cdrom
To display the content of the VBoxGuestAdditions.iso file, type: ls -al

- Install the VBoxGuestAdditions, type: sudo ./VBoxLinuxAdditions.run
- Restart VM, type: sudo reboot
- Check that VBoxGuestAdditions are installed, type: lsmod | grep vboxguest
You should see: vboxguest 249063 2 vboxsf
|
|


